

Cygwin/Xのインストール
最終更新日 2019年12月25日
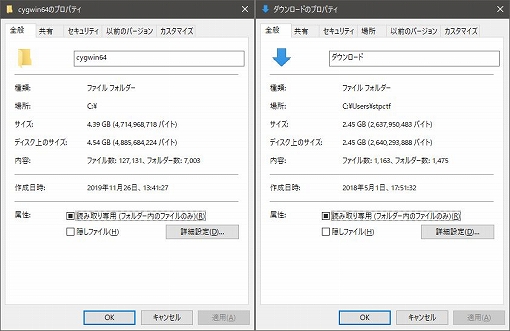
| (0) | Cygwin/Xのインストールには、インストーラーに約2.5GB、インストールフォルダに4.5GB超の領域が必要でした。PCのストレージに十分な空き領域があることをインストール前に確認してください。 また、インストール完了まで少々時間がかかります。 |
 |
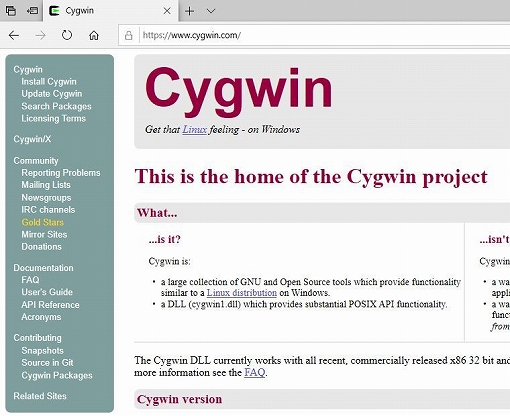
| (1) | ブラウザでCygwinのページにアクセスします。 ページ左にある「Cygwin/X」をクリックします。 |
 |
| (2) | Cygwin/Xのページに移動しました。 | 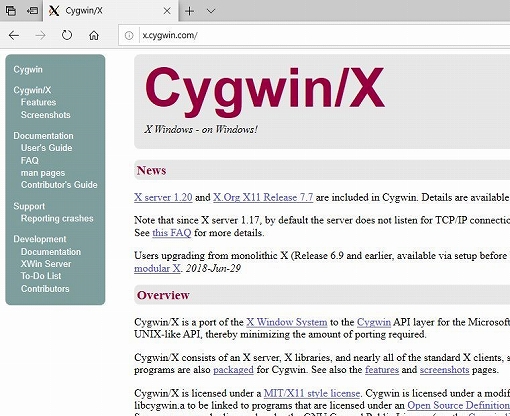 |
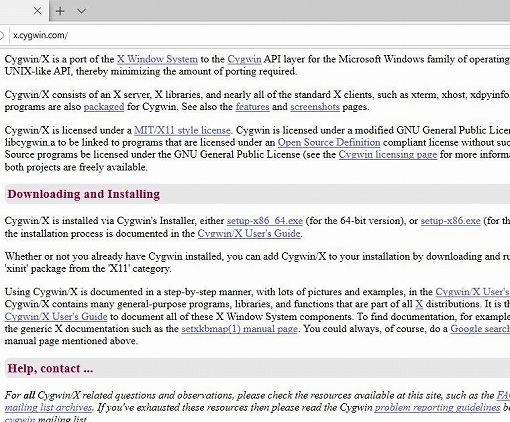
| (3) | 「Downloading and Installing」というところに、Cygwin/Xのインストーラーがあります。 今回は64bit版のsetup-x86_64.exeをクリックしてダウンロードします。。 |
 |
| (4) | Cygwin/XのインストーラーをPCに保存します。 | 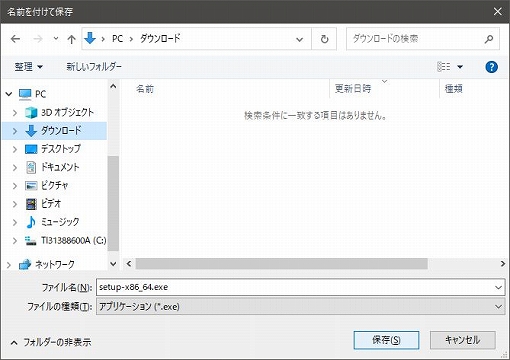 |
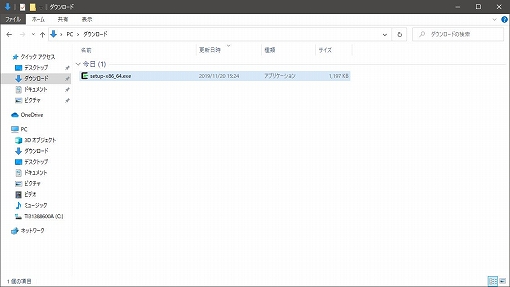
| (5) | インストーラーを保存したフォルダを開き、Cygwin/Xのインストーラーをダブルクリックします。 「インストールしようとしているアプリは、Microsoft検証済みアプリではありません」という警告が表示されることがあります。インストーラーをダブルクリックする前に、インストーラーを右クリック>「プロパティ」をクリック>「全般」タブ内の最下部にあるセキュリティの項の「許可する」にチェックを付ける>「適用」ボタンをクリック>「OK」ボタンをクリックした後にインストーラーをダブルクリックすると、この警告は表示されません。 「この不明な発行元からのアプリがデバイスに変更を加えることを許可しますか?」という問い合わせに対しては、「はい」をクリックします。 |
 |
| (6) | ウインドウ下部にある「次へ」ボタンをクリックします。 | 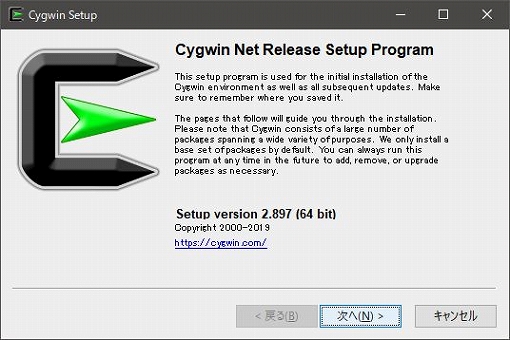 |
| (7) | ウインドウ下部にある「次へ」ボタンをクリックします。 | 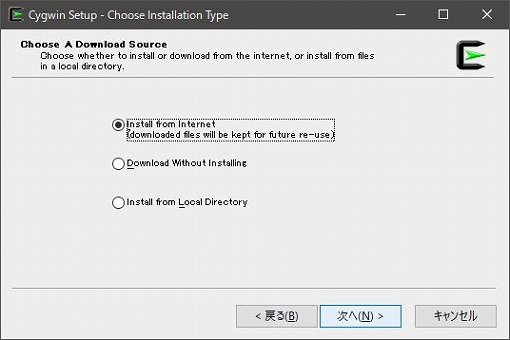 |
| (8) | ウインドウ下部にある「次へ」ボタンをクリックします。 | 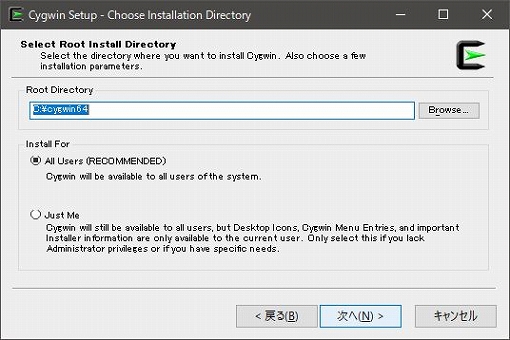 |
| (9) | ウインドウ下部にある「次へ」ボタンをクリックします。 | 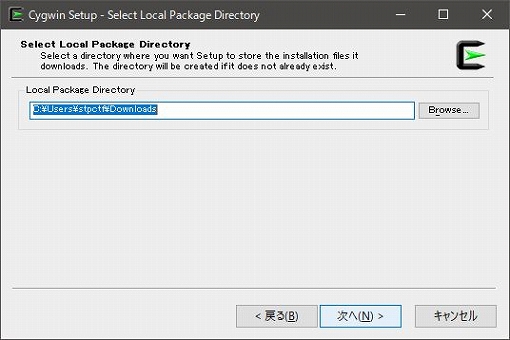 |
| (10) | ウインドウ下部にある「次へ」ボタンをクリックします。 | 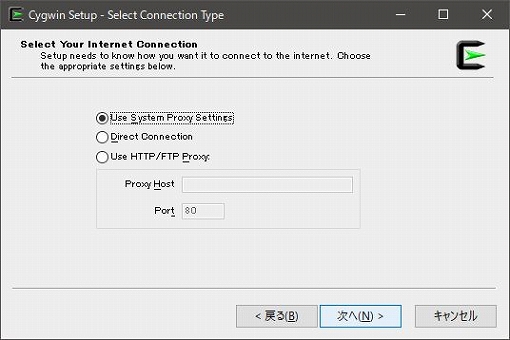 |
| (11) | ダウンロードサイトを指定します。ここでは、速度が期待できる国内のサイトを指定しました。 ウインドウ下部にある「次へ」ボタンをクリックします。 |
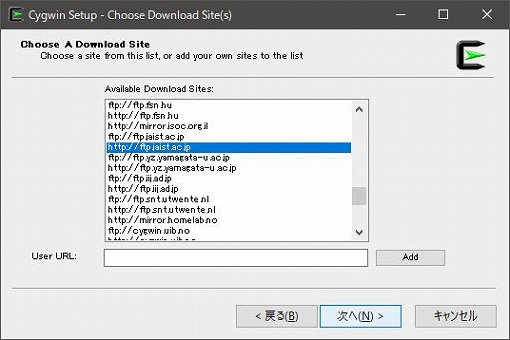 |
| (12) | ダウンロード・インストールが始まります。 | 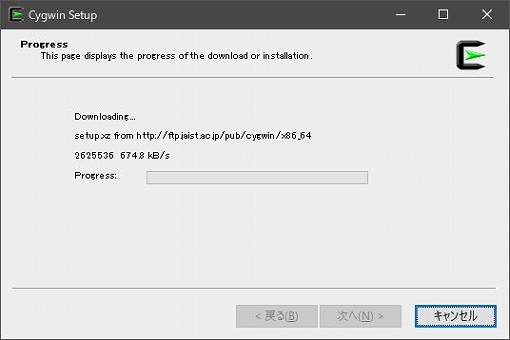 |
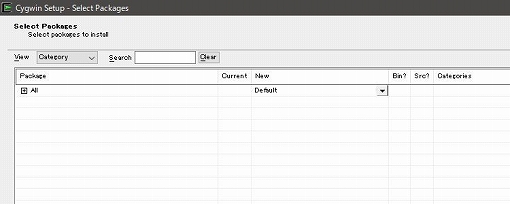
| (13) | ダウンロード・インストールが終わると、セットアップウインドウが開きます。 「All」という文字の左にある「+」記号をクリックして展開します。 |
 |
| (14) | 必要なパッケージを指定していきます。 まず、X11の行の逆三角形をクリックして「Install」に変更します。 | 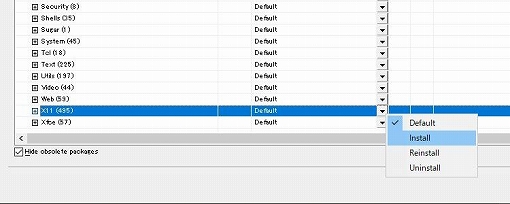 |
| (15) | X11が「Default」から「Install」に変わりました。 | 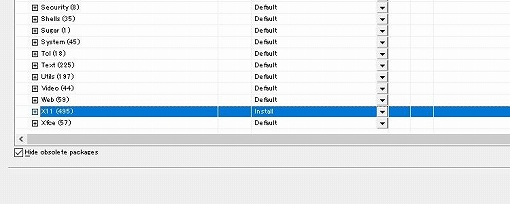 |
| (16) | opensshが「Skip」になっているので、逆三角形をクリックして新しいバージョンを指定します。 | 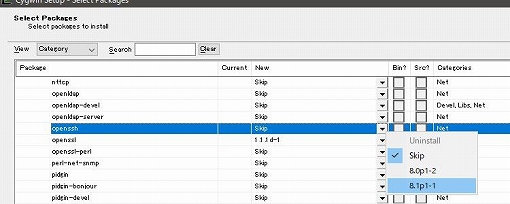 |
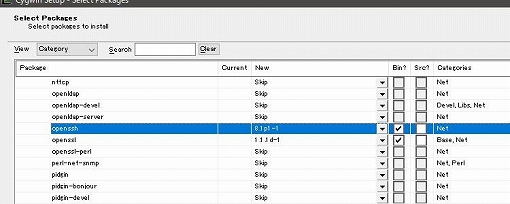
| (17) | opensshの新しいバージョンをインストールするよう変更しました。 ウインドウ下部にある「次へ」ボタンをクリックします。 |
 |
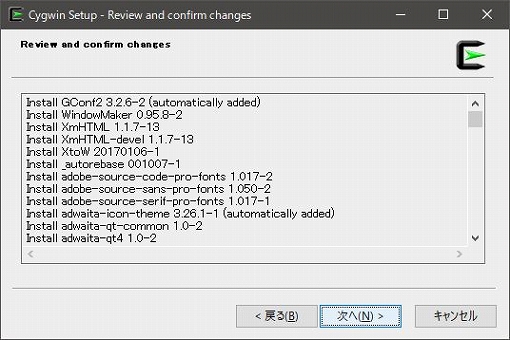
| (18) | インストールされるパッケージの一覧が表示されます。 ウインドウ下部にある「次へ」ボタンをクリックします。 |
 |
| (19) | ダウンロード・インストールが始まります。 | 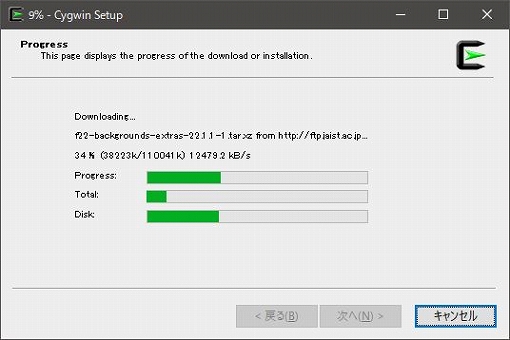 |
| (20) | エラーになった場合は、ウインドウ下部にある「Retry」をクリックします。 | 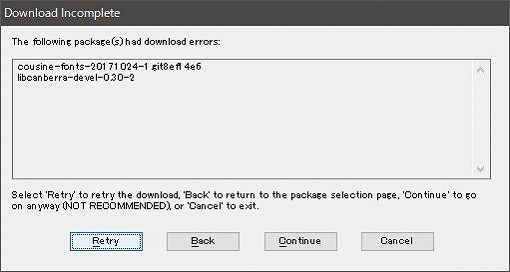 |
| (21) | インストール完了後は、ウインドウ下部にある「完了」ボタンをクリックします。 | 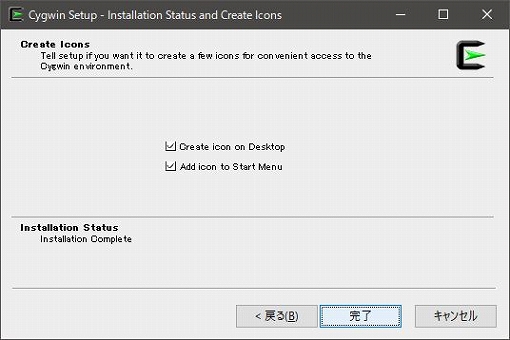 |
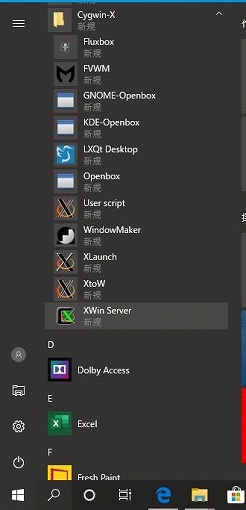
| (22) | では、Xサーバを起動させます。 スタートボタンをクリック、「Cygwin-X」フォルダのアイコンを探してクリックして開き、「XWin Server」アイコンをクリックします。 |
 |
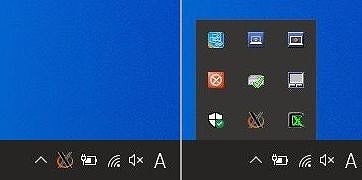
| (23) | タスクバーの通知領域内に「X」アイコンが表示されます。「X」アイコンが見つからない場合は「^」をクリックすると表示されるはずです。 緑の「X」アイコンが表示されると、Cygwin/Xのアプリが使えるようになります。 |
 |
| (24) | 緑の「X」アイコンを右クリック、「システムツール」にマウスポインタを置いて開き、XTermをクリックしてみます。 | 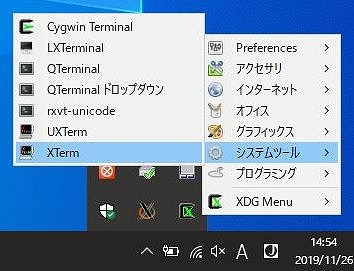 |
| (25) | 端末アプリが起動しました。 | 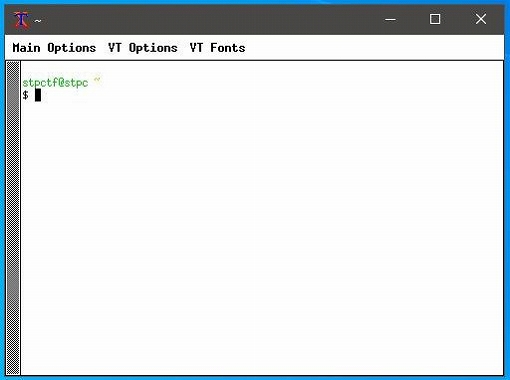 |
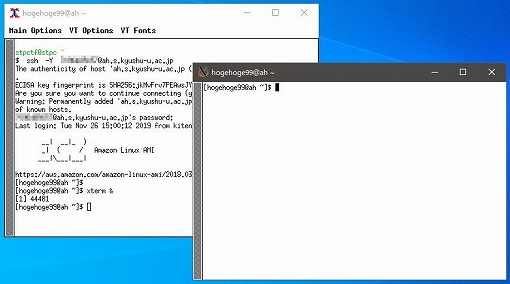
| (26) | リモートサーバのXクライアントを起動してみます。 リモートサーバに "ssh -Y リモートサーバのユーザ名@リモートサーバのFQDN(またはIPアドレス)" でログイン、リモートサーバのxtermを起動させてみました。 |
 |
| (27) | Cygwin/Xを終了させる場合は、緑の「X」アイコンを右クリック、「XDG Menu」にマウスポインタを置いて開き、Exitをクリックします。 | 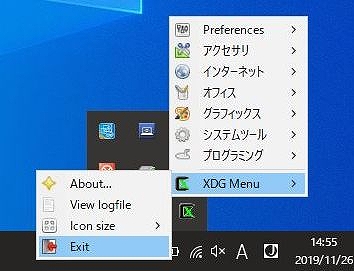 |
Installing Cygwin/X
Last Updated: December 25, 2019
| (0) | Installing Cygwin/X requires approximately 2.5GB for the installer and over 4.5GB for the installation folder. Please ensure that your PC has sufficient free storage space before starting the installation. Note that the installation process may take some time. |
|
| (1) | Open your browser and access the Cygwin website. Click “Cygwin/X” on the left side of the page. | |
| (2) | You will be redirected to the Cygwin/X page. | |
| (3) | Under “Downloading and Installing”, you will find the Cygwin/X installer. For this guide, click “setup-x86_64.exe” to download the 64-bit version. | |
| (4) | Save the Cygwin/X installer to your PC. | |
| (5) | Open the folder where the installer was saved and double-click the Cygwin/X installer. You may see a warning stating “This app you’re trying to install isn’t a Microsoft-verified app.” To avoid this warning, right-click the installer before double-clicking it, select “Properties”, go to the “General” tab, scroll to the bottom and check the box labeled “Allow” under the “Security” section, click “Apply”, then “OK”, and finally double-click the installer. When prompted with “Do you want to allow this app from an unknown publisher to make changes to your device?”, click “Yes”. |
|
| (6) | Click the “Next” button at the bottom of the window. | |
| (7) | Click the “Next” button at the bottom of the window. | |
| (8) | Click the “Next” button at the bottom of the window. | |
| (9) | Click the “Next” button at the bottom of the window. | |
| (10) | Click the “Next” button at the bottom of the window. | |
| (11) | Select a download site. In this example, a domestic site with expected high speed is selected. Click the “Next” button at the bottom of the window. | |
| (12) | The download and installation will begin. | |
| (13) | Once the download and installation are complete, the setup window will open. Click the “+” symbol to the left of the word “All” to expand the list. | |
| (14) | Select the required packages. First, click the triangle in the “X11” row and change it to “Install”. | |
| (15) | The “X11” package will change from “Default” to “Install”. | |
| (16) | The “openssh” package is set to “Skip”, so click the triangle and select the latest version. | |
| (17) | The “openssh” package is now set to “Install”. Click the “Next” button at the bottom of the window. |
|
| (18) | A list of packages to be installed will be displayed. Click the “Next” button at the bottom of the window. | |
| (19) | The download and installation will begin. | |
| (20) | If an error occurs, click “Retry” at the bottom of the window. | |
| (21) | Once installation is complete, click the “Finish” button at the bottom of the window. | |
| (22) | Now, let’s launch the X server. Click the Start button, find the “Cygwin-X” folder icon, click to expand it, and then click the “XWin Server” icon. |
|
| (23) | You should now see a “X” icon in the notification area of the taskbar. If you don’t see it, click the “^” icon to reveal hidden icons. Once the green “X” icon appears, Cygwin/X is ready to use. |
|
| (24) | Right-click the green “X” icon, hover over “System Tools” to expand the menu, and click “XTerm”. | |
| (25) | The terminal application will launch. | |
| (26) | Let’s try launching an X client on a remote server. Log in using the command: “ssh -Y [remote-server-username]@[remote-server-FQDN-or-IP]”. Then launch xterm on the remote server. |
|
| (27) | To exit Cygwin/X, right-click the green “X” icon, hover over “XDG Menu” to expand the menu, and click “Exit”. | |